s“Without water, life would just be rock.”
Anthony Hincks
 In the previous two articles in this series, The Dangers of Storm Drains and The Water Cycle, we looked, respectively, at the negative effects human water diversion systems have on the Water Cycle, and what the Water Cycle is supposed to be like. In this article, we get to the good stuff!
How can we design small gardens and large landscapes, both, in a regenerative way that helps to restore some of what’s been lost.
Obviously, we can only do it in a small way. Even if we’re working on a 1,000 acre Re-Greening The Desert project, it’s still small compared to the size of the planet. But the more of us doing it, the better. And when your neighbors see the incredible results of what you’re doing, they’ll want to do it, too. And when this expands into municipalities doing it…well, we’re all on the right track, then.
None of us caused this. We were born into it. But we can all do our individual parts, to whatever extent we are able, to start making it right. Small shifts make big differences.
A wonderful way to make a healing impact on the Water Cycle is through Rain Gardens.
What is a Rain Garden?
Like Permaculture itself, Rain Gardens represent a total paradigm shift. The old mechanical universe worldview was based on scarcity. The Quantum Model of the Universe, however, is based on Abundance.
And even though Rain Gardens don’t have anything to do with Quantum Physics, per se, they have everything to do with working with Nature, rather than against. Like Permaculture, but in a different way, Quantum Physics knows the Universe is not only alive, but extremely Intelligent. More intelligent than we can even imagine.
Rain Gardens work in congruence with that Intelligence.
Utilizing native perennial plants, the natural slope of the land, some absorbent material, rain barrels and pipes, Rain Gardens are a beautiful and ecological way to absorb the water from impermeable surfaces like lawns, roof tops, driveways, patios and sidewalks, as well as sump pump discharges, air conditioner drippings and divert it into a small…or large…plant community.
If you take care, testing every step of the way, the water should find its way into the closest aquafer, within about 24-48 hours of a rainfall.
Locally, this reduces the draw on aquafers, means less channel erosion in rivers as well as fewer suspended solids and pollution in the waterways. Globally, it reduces the amount of stormwater pollutants entering our oceans. Stormwater is one of the biggest and worst sources of pollutants impacting the the oceans today.
Rain Gardens filter out up to 90% of chemicals and nutrients from the runoff of impermeable surfaces, and 80% of the sediment. They can be done anywhere, in any climate. What they do is mitigate extremes. They reduce floods during wet times and reduce drought in dry times. The only difference, from climate to climate is the types of plants you use. Natives.
And it’s beautiful! Native grasses, bird, bee and butterfly-attracting wildflowers, shrubs, flowering perennials, aesthetically arranged are not only low cost, but low maintenance, too.
What it’s Not
This is not a pond, wetland or water garden. Do not think in terms of fish. It is dry most of the time, only holding water for 12 to 48 hours after a rainfall. It is a sponge. The water is meant to soak in and percolate back into the local watershed…in the manner Nature prescribed.
How to Start
First, some arithmetic and some planning.
- You’ll need to know the square footage of all your impermeable surfaces. Rooftops, patios, driveways, etc. Not all of them will drain into the same Rain Garden.
- Observe what happens during a rain storm. Where does the water naturally pool up? Where does the water naturally want to go? Where are the natural depressions?
- Plan out the pathways for the water to follow. The less you deviate from the natural flow, the easier your life will be.
- In order to keep it simple, and avoid having to use pumps, you’ll want all your Rain Gardens down-slope of their water sources. Gravity is free and easy, requiring only the most subtle of downward slopes. 2 degrees is enough.
- Find out the average annual rainfall in your area, for the last five years or so, to give the best idea of what to expect. This will let you calculate the amount of water per square yard or meter, which will determine the sizes of your gardens as well as what plant species to use.
- Depending on the amount of rainfall in your area, and your soil’s percolation rate, a Rain Garden that’s only 10-20% of the size of a roof, can absorb all the runoff from it. How many roof surfaces empty into the same downspout? A Garden between 10-20% of the square footage of those combined surfaces will take it all.
- A spot that can be fed by two downspouts is better than a spot only fed by one.
- A spot that can be fed by multiple sources, such as downspouts, a greywater system as well the runoff on the ground is the best.
- You’ll want a spot where the water table is at least 2 feet down, from the shallowest point.
- Stay away from trees that don’t like to have wet feet for long periods.
- Stay at least 10 feet away from the house, or other buildings.
- Stay at least 50 feet away from septic systems and slopes steeper than a 15% grade.
- Find out where any underground utilities are.
- Test the percolation rate in all the spots that seem like good places.
- Do a Ribbon Soil Test to make sure the site does not have heavy clay soil.
How To Test the Percolation Rate

It’s easy.
- Grab a ruler or yardstick and a shovel.
- Dig a small hole, about 4 inches in diameter and 6 to 12 inches deep. It does not have to be exact.
- Fill the hole with water as a pre-soak for your test, letting it soak in for an hour or two.
- Re-fill the hole with water and measure the water level with the ruler.
- Time how long it takes for the water to drain completely away.
Example: If 8 inches of water drains away in 12 hours, the percolation rate is 8 inches divided by 12 hours. Which would be 0.67. You’re looking for anything higher than 0.5. With this kind of percolation rate, you’ll only need to dig down 18 inches. If it’s lower than 0.5, you’ll need to dig it 30 inches deep. If it’s less than 0.1, it’s not a good place for a Rain Garden. If it’s 0.15, use your best judgment. The point is for it to drain well and not cause problems in the future.
If the idea of doing any more arithmetic is abhorrent to you, that’s fine. Just set a timer and check the water level every hour. If it soaks in at a rate of one half inch or more, every hour, you’re good to go. If it’s a lot less than this, you’ll want to test other possible sites.
 How To Do a Ribbon Soil Test
Also very easy. You can do them when you do the percolation tests.
First, dig down 4 to 6 inches and scoop a couple teaspoonfuls of dirt into your hand. Then dribble in a little water. You want to make it wet enough so it will become moldable. Knead it and see if you can form it into a ball.
If it doesn’t form into a ball, it is very sandy. For a Rain Garden this is good.
Roll it around with your fingers and feel it. If it feels gritty, it’s sandy soil. If it feels silky, it’s silt. If it feels sticky or plastic it’s clay.
Then roll it back into a ball. Using your thumb, press it out across your index finger. See how long a hanging ribbon you can make. The longer and more solid a ribbon you can make, the higher the level of clay. Clay has a lot of coherence. It holds together. If you can make a ribbon that’s 1 to 2 inches long, your soil has a lot of clay.
This is good for making pots, but for a Rain Garden you want better drainage, so sand would need to be added. Conversely, the more sand in your soil, the less it will hold together. It will break apart while you try to make a ribbon. If your soil does this, plus has a good percolation rate, you found a good spot!
It can still be a good spot, even if the soil is clayey. You’ll just need to add sand. How much sand? Start adding some and test it again. Chop up the soil and dump sand in on top of it. Chop, chop, chop it up some more, turn, turn, turn, to mix in in and test it again.
If your whole property is a clay pit, you’ll just have to dig a lot deeper and add a lot of sand.
What to Avoid
While a natural depressions is a logical place to put a Rain Garden, if it’s soggy or boggy that means it’s not draining. You could probably figure out a complicated solution involving backhoes and digging channels and building up earth berms, but it might be easier to plant some extra thirsty trees there. Or build up a nice big hügelkultur bed on top of it.
Generally speaking, planting trees in the Rain Garden is not the best idea. But nothing is set in stone. Trees that like to have wet feet for periods of time could do quite well. Do your research. Ask people who know. Use only native species.
Also, slopes with a 15 degree grade, or more, are not good spots.
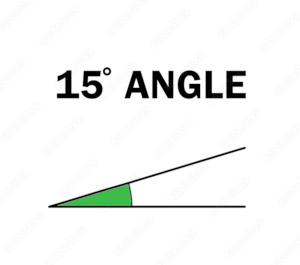

It’s too steep. You might want to terrace the slope with berms & swales, putting in shrubs and trees, and put in a Rain Garden at the bottom, if that works on your site. This would be a of work, but if you’re just starting out, it could be the beginning of a beautiful infrastructure.
What Shape?
You’ve already figured out the size, but what shape should you go for? It really depends on your site. What’s already there and how will the new garden visually interact with it? Also, form should follow function. A long narrow bed, perpendicular to a very wide flow of water, for example, would make a lot of sense. And it can still be cut into a nice flowy shape.
Because it needs to look good, too, doesn’t it?
Especially if you want to inspire your neighbors to make Rain Gardens. And you do. And after enough of you have made Rain Gardens, you want to all start going to town hall meetings, with pictures, and insist on having municipal Rain Gardens everywhere. Who knows? It could turn into a paid gig. School kids could get credit for helping. The possibilities for regenerative landscaping are endless…
Irregular amoeba shapes are lovely, as are ovals, teardrops and kidneys. Use a garden hose to outline various possibilities and imagine how it will look against the existing plantings. Trial and error is a good way to figure out most things.
Once you know what you want, cut the sod out about 18 inches larger, if you have sod. That kind of grass is notorious for invading garden beds. (You might want to consider replacing it with a clover lawn, for all-over fertilizing.)
Start Digging!
Remove grass and soil to your pre-determined depth, creating a flat bottom. This will help the water percolate evenly. If there is a bit of a slope, use some of the dug up soil to make a berm along the lower edge of the garden. Tamp it down to make it stable. It should be about two feet wide at the base and at least a foot wide across the top, with the peak being at least six inches higher than the water level when full. Depending on the size, it may need some large rocks along the base for stability.
Rain Barrels & Piping
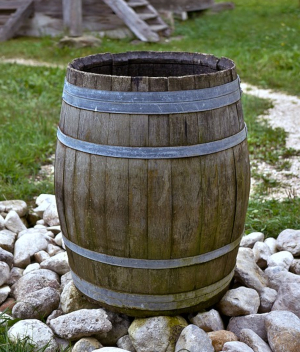
You’ll want to add your rain barrels and piping while the garden is still all dug up. Having rain barrels installed under all your downspouts allows you to save water for drier times. Most of them will already have a spigot, but if yours don’t, they’re easy enough to add. You don’t have to be a master plumber!
Obviously, they need to be slightly higher than the gardens they will be emptied into. Put them up on blocks if you have to. Dig a small trench for the pipe that will lead to the garden. Something rigid and smooth, like PVC would work nicely. You’ll have to do a bit of trial and error to get it to just the right slope. Test it and have patience.
You’ll want to position the end of the pipe so it sits just above the garden. When it’s above ground, it keeps it from getting clogged up. Put a flat stone on the ground for the water to pour onto, to prevent erosion. You can also disguise the pipe end, if you like, with some rocks. One on either side of it, with a flat one across the top would hide it from view. But so would simply planting around it.
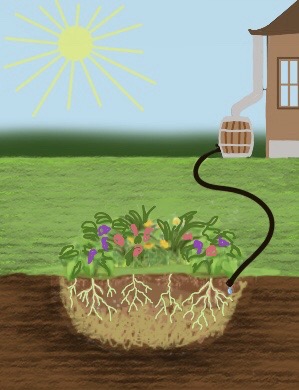
If there is a cement pathway or other obstacle in the way of your piping, and you don’t want to, or can’t dig it up, just attach a hose to the rain barrel spigot, when need be. You want to have enough rain barrels so you can store a third of the water from the surfaces they’re collecting from. Based on the average annual rain fall numbers, you will be able to determine how many to use.
Pour a few gallons of water into your barrels and test them, before you add your dirt back in. Then do it again after you’ve added it back in. It’s good to make doubly sure, first that everything is flowing properly, and then that it’s soaking in well.
Make Rain Garden Soil
If your soil is free of clay, mix it in a 2:1 ratio of soil to compost. For every unit of compost, use two units of soil. If your soil has a lot of clay, move it another location and make up a 6:4 ratio of sand to compost. 6 units of sand to 4 units of compost. It doesn’t matter what size units you use, as long as you’re consistent. They can be shovel fulls, buckets, or any good sized scoop. You can make your mixture right in the hole, raking together as you go, or mix it into a wheelbarrow to dump in all at once. It doesn’t matter. Just fill in the dug out area, sloping up the sides.
Once everything is in place and functioning properly, it’s time for the fun part…
Adding Plants!
Whether you’re making a food or a flower garden, a butterfly garden or a poisonous plant garden, remember to only use native species. Use as large a variety as you have room for. Perennials, naturally, are the first choice. Group them so the tall ones are behind the short ones, in relation to the sun, so none of them get stuck in the shade. Unless, of course, your Rain Garden is also a shade garden. Put the ones who like more water on the lower parts of the slope, where the rainwater stands the longest and the ones who prefer to be dryer higher up on the slope.
And mulch thickly. Replenish it across the years as needed.
Rain Garden Landscape Design
Taking it to the Next Level
If you have a large property and a complex pattern of runoff across it, you may want to dig a whole series of holes that lead the water from one to the next, to the next, soaking into each one as it goes. Most likely you will need to incorporate culverts as well as rocky berms to keep the water moving through the designated course, and not spreading out all over the place.
Well placed formations of rocks can serve as sediment filters. This is important if the water is moving fast from one reservoir to another.
This is called geo-engineering. But don’t let the name scare you. You don’t need to be an engineer. You just have to be capable of observing and learning. With common sense and trial and error, anybody can do this. And it’s simple, really.
With large, backhoe dug holes, you can use beautiful rocks as a way of incorporating terraces along the insides of the holes, for a multi-layer effect. The lower terraces would support more water loving types while the higher terraces would be appreciated by those that like it a bit drier.
The reservoirs should act as pools, for water to be caught in. But you also need good overflow outlets, so you don’t end up with a swamp. The way to to this would be to cut a little overflow outlet in the edge of the reservoir on whatever side of it you need the excess water to drain. Maybe set a rock into each side to keep it intact. Then dig a bit deeper, a few inches to a foot or so, around the reservoir, in as large an area as you figure you’ll need for a leach field and fill it with a permeable aggregate. You’ll need to repeat the percolation tests every time you add a new element like this.
This type of advanced geo-engineering is beyond the scope of this article. I bring it up as a way to inspire your creative juices. Start small and don’t be afraid to expand on your ideas, learning more with each Rain Garden you add…or add on to.
Read More About It
Rainwater Harvesting for Drylands and Beyond, volumes 1 & 2, is a classic. Total self-reliance. It tells you everything you need to know about harvesting rainwater in the desert. Even if you’re not in the desert, you can apply the principles to your property and create living air conditioners of vegetation. Because Rain Gardens work in every climate. The only difference, from climate to climate, is in the plants.
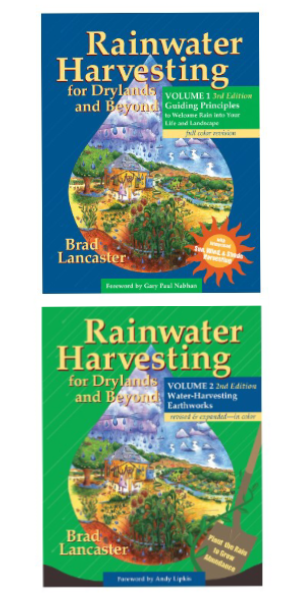
Volume 1 focusses on how to conceptualize, design and implement water, sun, wind and shade harvesting systems for, not just your own home and landscape, but for your community. It teaches you how to assess your site and gives you a broad array of strategies to maximize their potential. It empowers you to create a site specific, integrated, multi-functional plan to suit all your needs. This full-color edition contains over 290 illustrations, as well as stories of people who have successfully brought rain into their lives. So you’ll know you can too.
Volume 2 builds on volume 1 by showing you how to “plant the rain” by making Rain Gardens and by creating water-harvesting “earthworks.” Earthworks are simple, inexpensive strategies and landforms that passively harvest multiple sources of free on-site water within “living tanks” of soil and vegetation. The plants become regenerative producers of resources. They circulate the water into beauty, food, shelter, wildlife habitat, timber and forage, while controlling erosion, reducing down-stream flooding, dropping utility costs, increasing soil fertility, and improving water and air quality.
Conditions in your yard, school, business, park, and neighborhood will improve as you enrich the ecosystem and inspire the surrounding community. And you don’t even have to be a land owner.
Detailed step-by-step instructions with over 550 images show you how to do it, and plentiful stories of success motivate you so you will do it!
These books are written by the brilliant Brad Lancaster. Check out his Ted Talk here.
These books are published by Chelsea Green, an employee owned company that promotes the politics and practices of sustainable living through knowledge and literature. I am so proud to be one of their affiliates.
In Conclusion
Besides being aesthetically pleasing and easy to maintain, once they’re established, Rain Gardens provide a lot for your community. They tremendously improve the water quality by filtering out 90% of the typical pollutants. They reduce droughts & flooding locally by reducing the amount of stormwater being dumped directly into creeks and rivers. This also avoids the erosion that goes with that. And by preserving native plants, Rain Gardens also attract, feed and house beneficial insects, butterflies and birds. They are a part of your community, too.
So are you ready to start planning your own Rain Garden? I look forward to your thoughts. Please leave a comment below. I love to hear from you!
“All water is holy water.”
― Rajiv Joseph


Hi Anna-Vita,
The depth of information provided, from the conceptual understanding to the practical steps, is truly invaluable.
I’m particularly impressed with the emphasis on working harmoniously with nature and the broader benefits Rain Gardens offer to the community.
Your mention of the books by Brad Lancaster has piqued my interest, and I’ll definitely be checking them out.
Do you have any recommendations for those living in particularly arid regions on how to maximize the efficiency of a Rain Garden?
Thanks again for sharing your knowledge!
Hey Eric
These two books are about doing Rain Gardens in the desert…and beyond! Brad Lancaster harvested 100,000 gallons of water in Tucson AZ, with only 11 inches of rainfall per year. So, if you can do it there, you can do it anywhere! The techniques remain the same where ever you do it. The only difference, from place to place, is in the types of plants you would use.
Thank you for your excellent article about rain gardens. I heard recently that a building collapse in Miami was caused by faulty drainage from planters, and I cant help but feel that all the services need to be properly designed and planned including natural light, artificial lights, ventilation, water supply, drainage from planters etc.
Boy, those must’ve been some huge planters to collapse a whole building!
The idea behind rain gardens is truly intriguing! Establishing an attractive and environmentally conscious method to handle rainfall seems highly advantageous. Would it be possible to provide additional information regarding the particular plant selections that flourish within rain gardens? I’m interested in learning about the types of plants that effectively balance visual appeal with practical utility.
That would be a long, long thing to write.
You want to use perennial plants that are native to your area. This is an easy enough thing to find out from a google search. A recon mission to your local garden center would probably be fruitful, as well.
What an insightful and informative article on Rain Gardens! It’s inspiring to see the emphasis on working in harmony with nature and utilizing regenerative practices. The comparison with Quantum Physics and the shift from scarcity to abundance is a thought-provoking perspective.
The detailed steps provided for creating Rain Gardens, from planning and testing to the choice of native species and proper soil composition, make it approachable even for beginners. The focus on mitigating water runoff, reducing pollution, and supporting local ecosystems showcases the broader impact these gardens can have on both local and global levels.
The article’s emphasis on community involvement and the potential for municipal Rain Gardens is particularly intriguing. It’s heartening to think about the collective positive impact that can be achieved through these efforts.
The inclusion of resources like the books by Brad Lancaster and the Ted Talk adds further value to the article, giving readers the tools to dive deeper into this topic.
Overall, this article not only educates about Rain Gardens but also motivates readers to take action in creating their own gardens, fostering a more sustainable and interconnected environment. Well done!
Hi Les,
Thanks. It took me a long time to write it. There’s a lot more going on here than meets the eye, and I kept having to do more research.
I came across a quote, after I’d finished writing it, that I thought would be good to include. I think I’ll do that here.
“When a complex system is far from equilibrium, small islands of coherence in a sea of chaos have the capacity to shift the entire system to a higher order.”
–Ilya Prigogine
Nobel Laureate
One person acting as a small island of coherence, can have the capacity to shift an entire community into a higher order. And one community can shift a region. And so on…
Glad you liked it,
Anna
This is the first time I have read about the concept of a rain garden and you have certainly given a lot of advice for starting one up, even as far as testing the soil out. So you recommend not planting trees if the area is too water logged or wet. Do you perhaps have a list of plants somewhere that is best suited for a rain garden?
Planting natives is the best practice. And since every location has its own specific list of what indigenously grows there, compiling lists for the entire world would be a thankless and totally exhausting task. Especially when it’s so easy for a person to find out for themselves. So, no. I don’t have a list somewhere. A quick Google search should provide the answer.
Thank you for this comprehensive look at the rain garden. It will help me preserve nature and make provision of fresh vegetables and fruits for my immediate community. From the digging, rain barrels creation, and planting to landscaping. You make everything in detail and easily achieved. We will get to work on our available land space.
Yay!
This makes me so happy! And I would love it if you checked back in, in the future, with pictures!
Anna